Google Drive at University
![]()
Google Apps at the University of Auckland
Due to worldwide changes by Google, from 2022 the University will only provide the student email service within the Google GSuite of applications for new students. Google Drive, Google Docs, Sheets and Slides will no longer be available to new students, except where collaborating with staff or previous students that have created existing material to share. Current students with a Google Drive will have until 1st October 2023 to migrate their own information onto other services.
For further information please refer to this link Google GSuite – The University of Auckland.
The username for a student Google Drive is (username)@aucklanduni.ac.nz
Further information on using Google Apps at the UoA.
Need help with Google apps?
Students –for IT support contact the Student IT Hub: Ask us (auckland.ac.nz)
The apps managed by the University include:
- Calendar
- Contacts
- Drive
- Groups
- Student email
- Sites
The apps managed by Google include:
- Blogger
- Google+ (with Google hangouts)
- Google analytics
- Picasa web album
What is Google Drive?
Google Drive is a key component of G Suite.
Google account: You need to have a Google account in order to own Google Documents or to be given access to documents that other Google users share with you.
Google accounts do not have to use Google email addresses; you can associate any email address with a Google account.
Your student email uses the Gmail interface and is provided by Google.
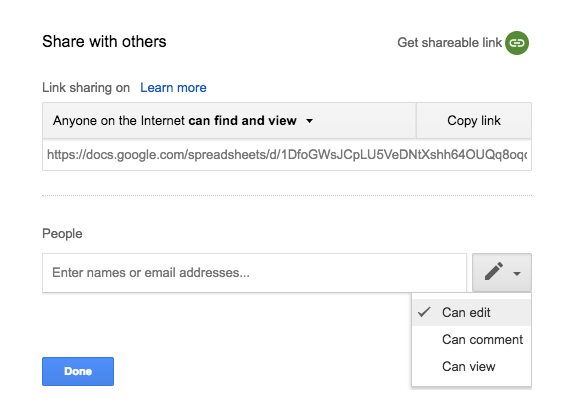
Access levels: Google Drive when sharing has: view, comment and edit. If you create, sync, or upload the file, you’re automatically the owner of that item.
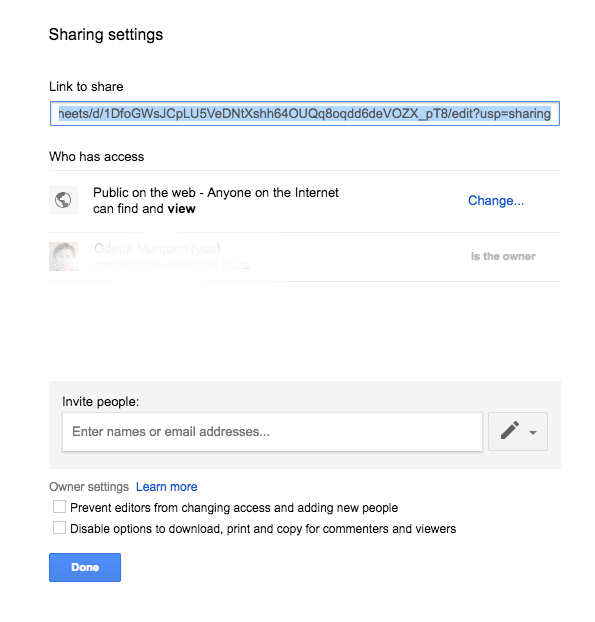 |
You can easily change how you’d like your document to be shared by adjusting the sharing settings.
The person who initially creates the file is the owner. However, this can be simply adjusted in the settings as required.
 |
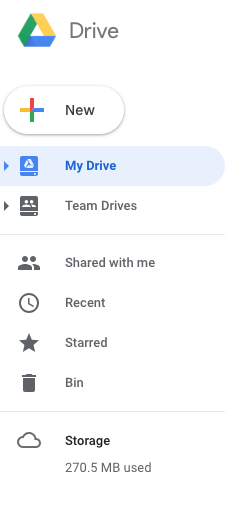
Folder locations: Google Drive has two locations:
- My drive: Where you have your own personal documents
- Shared with me: where all of the shared documents and folders are stored.
 |
Strategically organise your Google Drive: Define your shared top-level team folders at the beginning and give them descriptive titles.
Once you have established your folder structure, you can upload files into them.
Remember to also give your files descriptive titles, especially as you will be collaborating with others and they will also need to be able to identify the files by the titles.
How to organise your files
Team Drives
Team Drives are shared spaces where teams can easily store, search, and access their files anywhere, from any device.
Unlike files in My Drive, files in a Team Drive belong to the team instead of an individual. Even if members leave, the files stay precisely where they are so your team can continue to share information and get work done.
For further information on Team Drives
Further information
Open Google.com and click the blue ‘sign in’ button at the top right of the screen and follow the steps provided.
Visit the G Suite Learning Centre for further information on how to:
- Upload and store
- Sync and access
- View and update
- Organise and search
- Share and collaborate
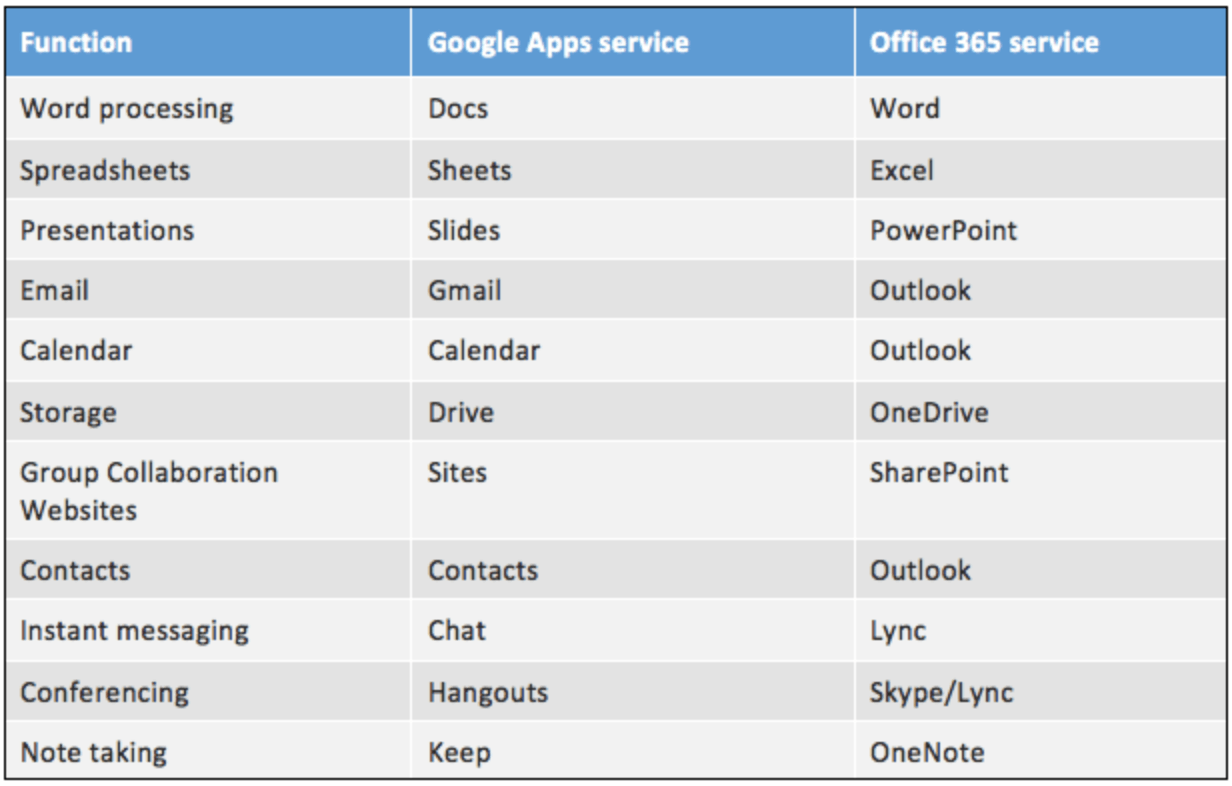
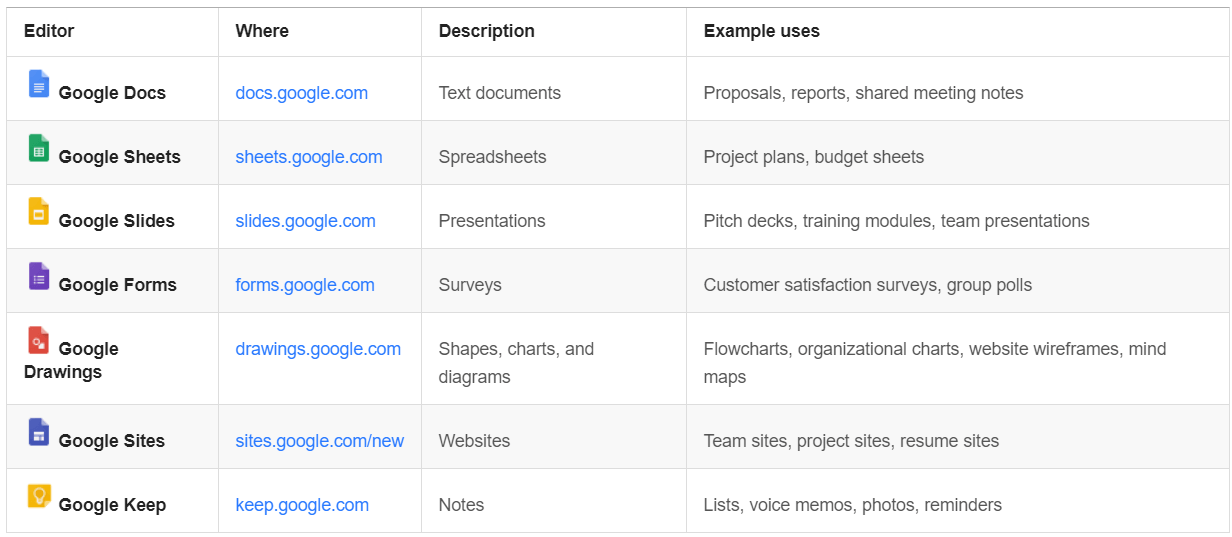
Comparing Google Apps to Office 365
 |
Explore Google Drive
Now that you have a Google Drive account you will need to spend some time familiarising yourself with the tools.
Activity:
Step 1. Log into your University Google account and go to Google Drive.
Step 2. Go to My Drive
Step 3. Create a new folder from the ‘My Drive’ drop down and name it ‘test folder.’
Step 4. Upload a file of your choice into the ‘test folder’ and give it a descriptive title.
Activity:
Share your folder
Step 1. Share your folder with your group or neighbour. Select the name of your folder in the breadcrumbs, and then select Share.
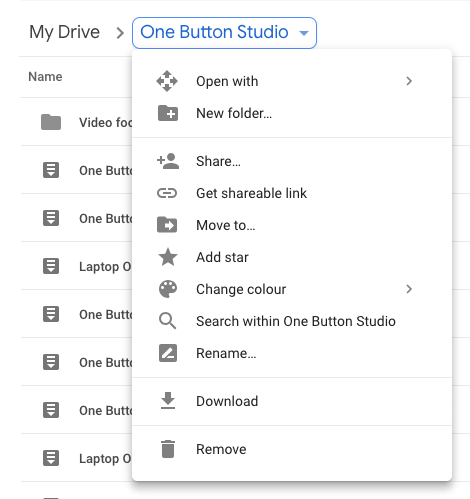 |
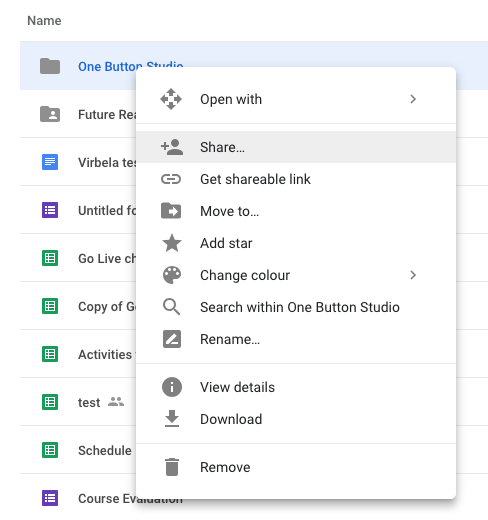
Alternatively, share the folder from the file.
 |
Step 2. Select the method that you will use to share the folder.
- “Get shareable link” and share this with individuals that you would like to access the folder
- Enter the names and email addresses of the people that you would like to share the folder with
Step 3. Make sure that you’ve selected that the person you are sharing with can edit the document.
Share files from Google DriveFurther information: Organise your files in Google Drive
Google Docs - Transfer ownership
You are automatically the owner of any file in Google Drive that you create or upload.
There are numerous reasons why transferring off documents may be necessary, for example, a group member leaves etc.
Before you transfer ownership
You can only transfer ownership of Google files and folders. When you make someone else the owner of a folder, you still own the files inside. Learn more about sharing folders.
Files you can transfer
- Google Docs
- Google Sheets
- Google Slides
- Google Forms
- Google Drawings
- Google My Maps
- Folders
Learn more about transferring files to a new owner.
After you change file owners
When you make someone else the owner of a file, you won’t be able to:
- Transfer ownership, even back to yourself.
- Permanently delete the file from Google Drive.
Import and convert old documents to Google Docs
If you have existing text documents, such as Microsoft Word or Adobe PDF files, you can import and convert them to Docs.
- Go to Drive.
- Click New File Upload and choose a text document from your computer. Supported files include .doc, .docx, .dot, .html, plain text (.txt), .odt, and .rtf.
- Right-click the file you want to convert and select Open with Google Docs.
Converting your document from another program creates a copy of your original file in Docs format. You can then edit it in your browser like any other document.
Who is the anonymous animal and why is it looking at my Google Doc?
Anonymous people in a file on Google Drive
Who is the anonymous animal and why is it looking at my Google Doc?
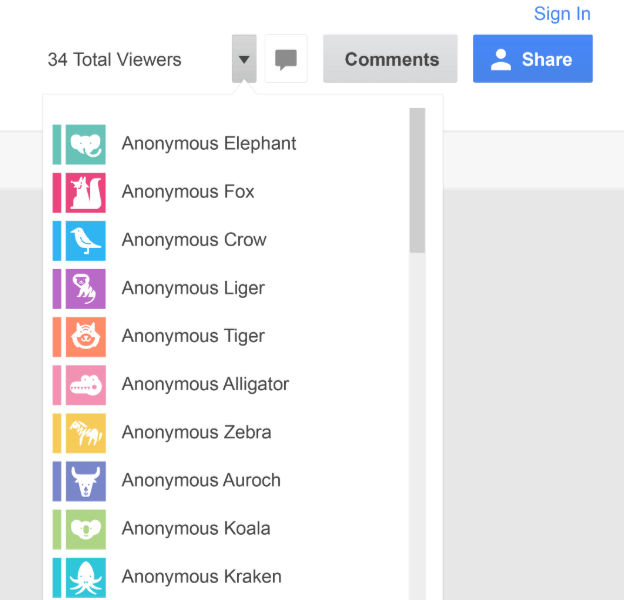 |
It’s an indication that you have set your Google Sheet to be view able online either publicly or “anyone with the link”.
If you set it to “anyone with the link” your spreadsheet can only be accessed by people who have the link you sent them. It’s as secure as a combination lock. People who have the combination (link) can get access. If they give out the combination (link), then others can get to it too.
If you want to see the names of the people viewing or collaborating on your sheet you will need to share it exclusively with their Google account address.
If you see someone you don’t know
Someone you don’t know might be looking at your file because:
- The file is shared with a mailing list.
- The file is shared with someone who doesn’t have a Google Account or isn’t signed in.
- Someone who can edit your file or has the link shared it with other people.
- Someone changed their Google Account name. You can see their email address when you click share > Advanced your file.
Revision history
Using the revision history you can see who edited what at what time.
In any Google Document, you can click ‘File’ and ‘see revision history’.
You will see a summary of changes, with the option of seeing more details. Notice that you can see edits by user and time.
Once you have added some text on the Google Doc with your team members, view the revision history and revert to an earlier version of the document.
Further information: See what’s changed in a file
Collaboration tools
Create and collaborate on files in your browser.
- Create new documents right in your browser – no software required
- Share your document with others
- Collaborate with simultaneous editing and real-time feedback
Google Slides
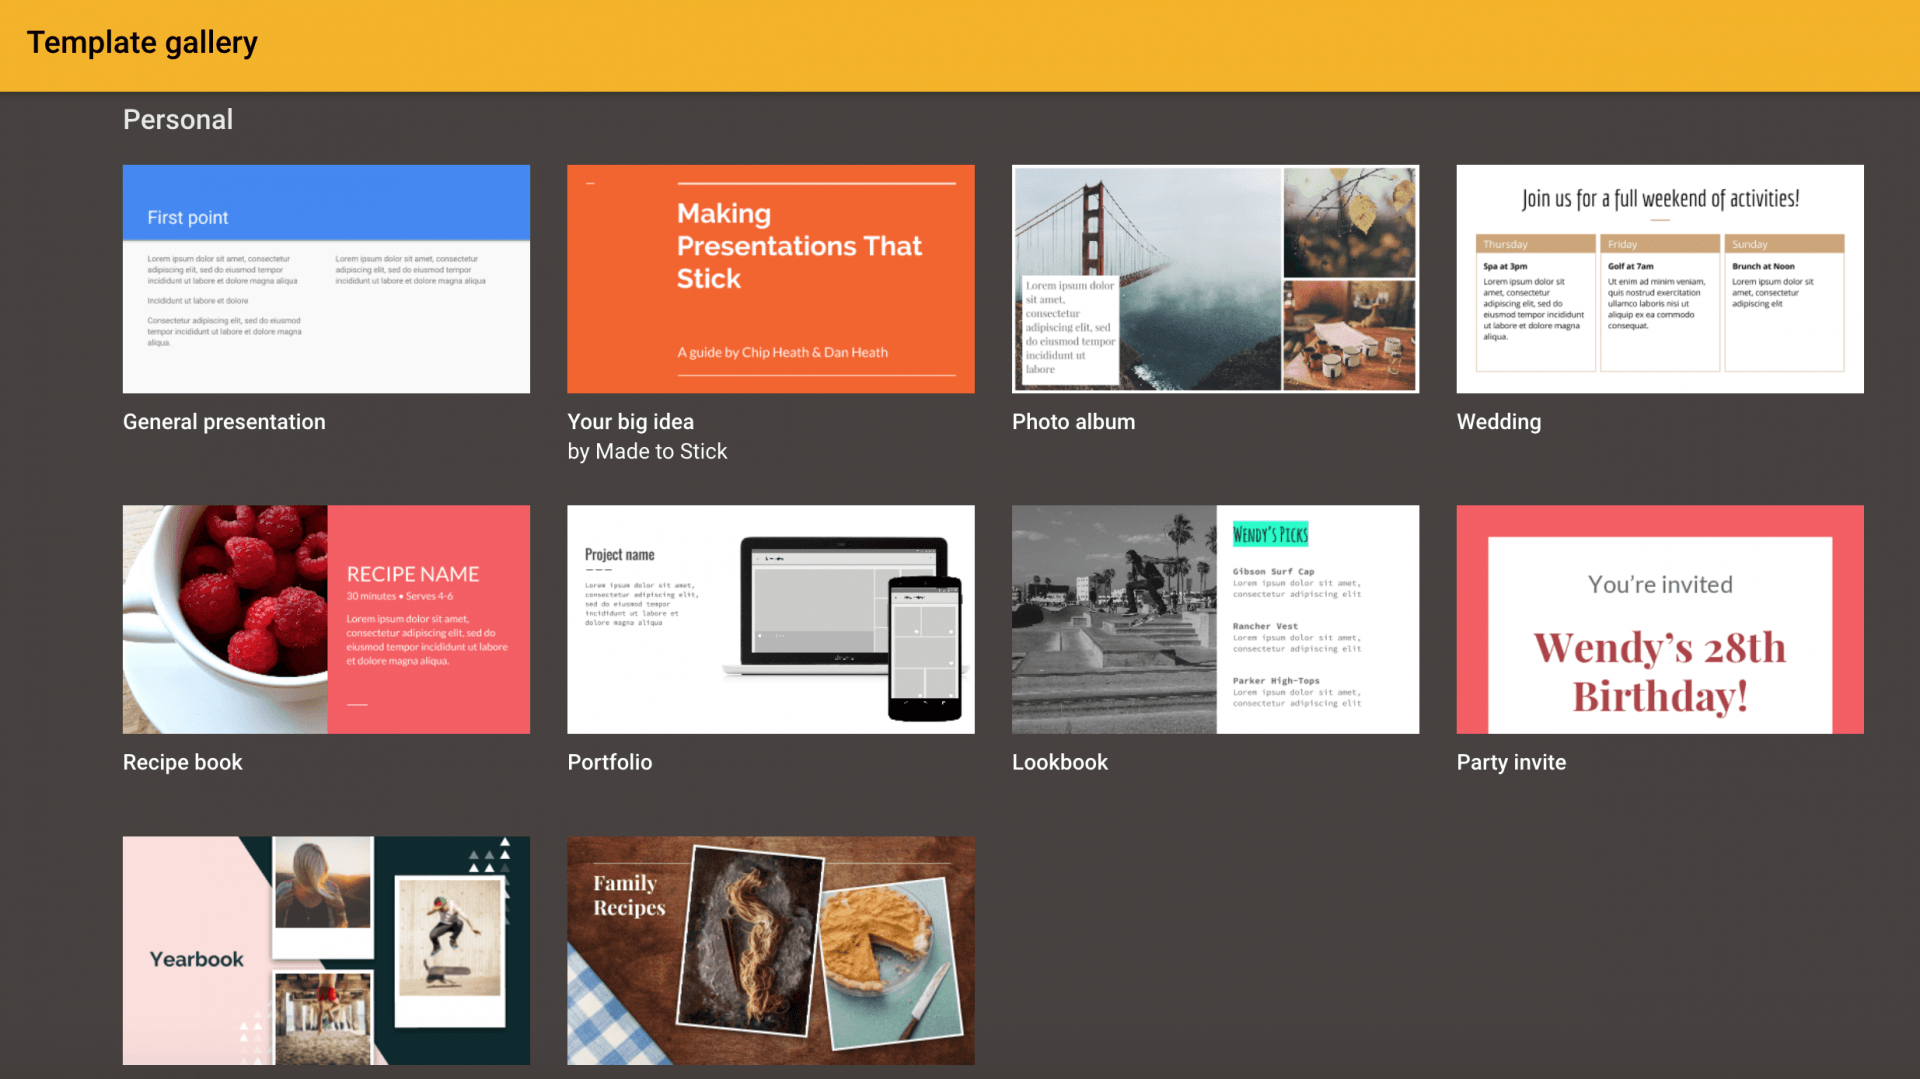
You can select from a variety of templates in the gallery.
Activity:
Go to Google Slides
1. View the templates and select the one for a presentation in your course.
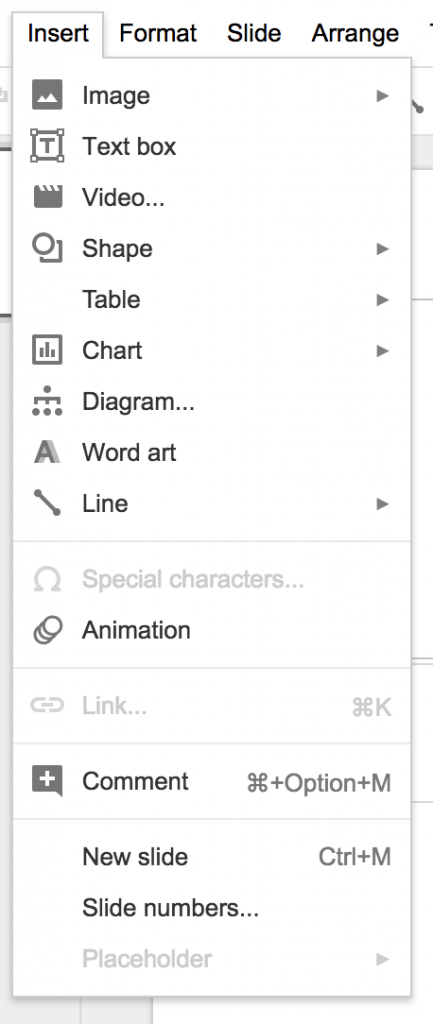
Activity: Adding content to your Google Slides
1. Add a video into your slide. Go to the Insert tab and select a Youtube video that is relevant to your presentation.
2. Add a rectangle shape to be the background frame for your video. Go to Insert > Shape > Rectangle.
Right click on the shape to select it, Select Order in the drop-down menu and Send to back
3. Select both the video and the background shape by holding down the left button on the mouse and dragging it over both objects. Right-click and on the drop-down menu select Align horizontally > Centre and Align vertically > Middle.
4. Continue to experiment with adding different shapes to frame images and text to your slides.
5. Aim to have at least 5 slides with some content from the Insert tab; images, text, shapes, video, charts etc.
![]()
 |
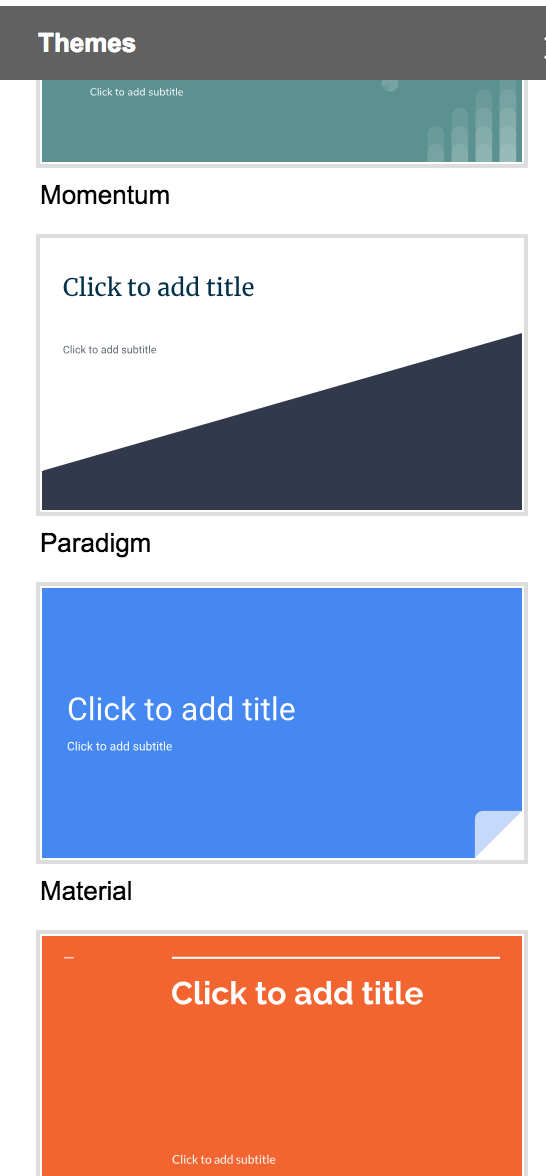
2. View the different theme options on the right-hand side.
 |
3.
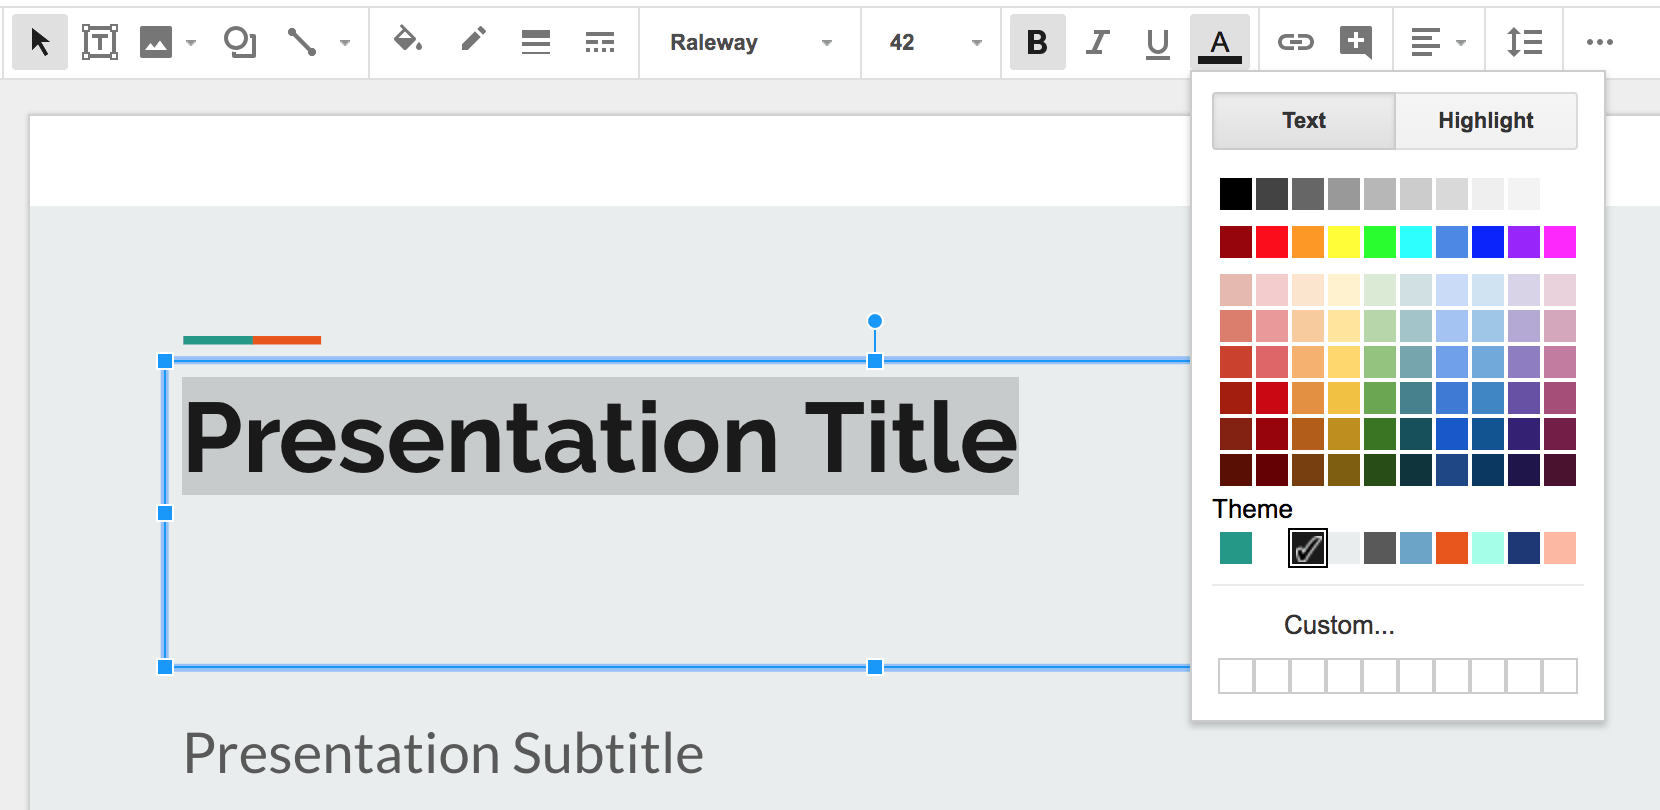 |
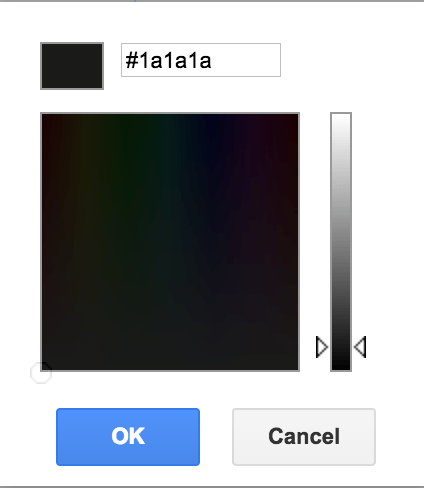
You can select different hex colours by visiting the
 |
Activity: Adding content to your Google Slides
1. Add a video into your slide. Go to the Insert tab and select a Youtube video that is relevant to your presentation.
2. Add a rectangle shape to be the background frame for your video. Go to Insert > Shape > Rectangle.
Right click on the shape to select it, Select Order in the drop-down menu and Send to back
3. Select both the video and the background shape by holding down the left button on the mouse and dragging it over both objects. Right-click and on the drop-down menu select Align horizontally > Centre and Align vertically > Middle.
4. Continue to experiment with adding different shapes to frame images and text to your slides.
5. Aim to have at least 5 slides with some content from the Insert tab; images, text, shapes, video, charts etc.
 |
Share your Google SlideYou can share your Google Slide with anyone by simply adding their email address.
Share your content: view, comment or edit your presentation in real time.
Edit in real-time
When someone is editing your presentation, you can see their cursor as they make changes or highlight text.
Chat and comment
Chat with others directly inside any presentation or add a comment with “+” their email address and they’ll get a notification.
Sharing
Sharing in Slides operates in the same way as Google Docs. You have different levels of access available to the people that you are sharing with.
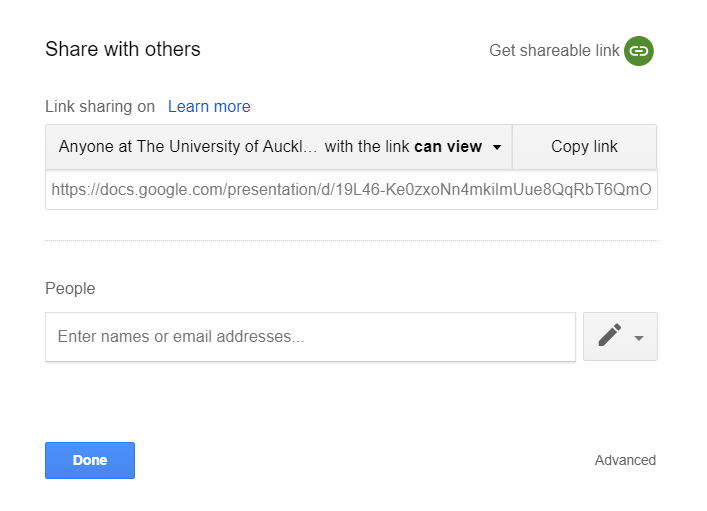
Activity:
Share your Google Slide with somebody in your group. Experiment with adding and editing content on the slides that have been shared with you. Add a comment about a feature on the slides that have been shared with you. Chat inside the slides in real time.